When connecting to a audio/video system on campus, you may need to select the proper camera, speakers and microphone in Zoom to use the equipment provided in the space. The guides below provides the steps to setup Zoom to work with the audio/video equipment in the space.
- Please note, the devices listed (camera, microphone & speakers) in the guides below will not represent the actual devices connected to your system. The devices (camera, microphone & speakers) you will see on your computer will be different than the guide.
- If the camera, microphone or speakers is named or listed as "internal", this indicates the device is built into your computer and should not be used when connecting to a audio/video system (depending on your requirements).
Click to expand section
macOS - Zoom Video
- With the Zoom desktop app open, select the “Gear” icon in the top right corner of the Zoom window.

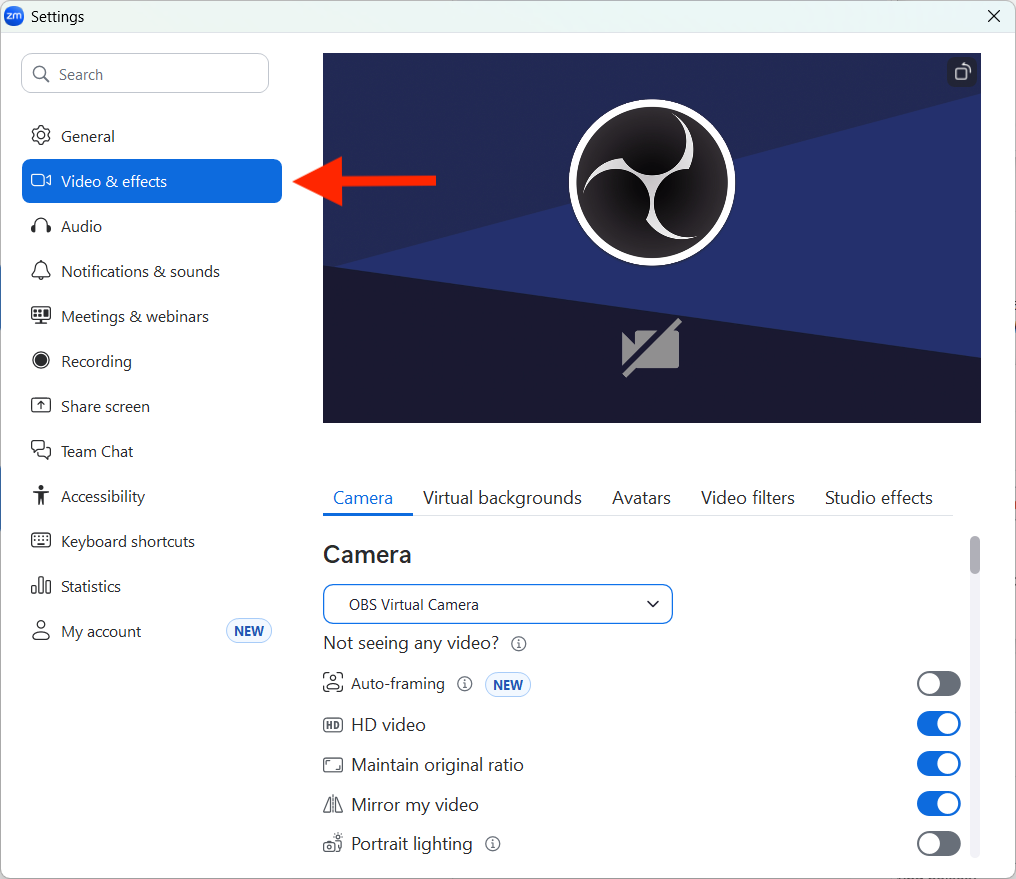
- Once the settings window is open, select “Video & Effects” from the list on the left side of the settings window.
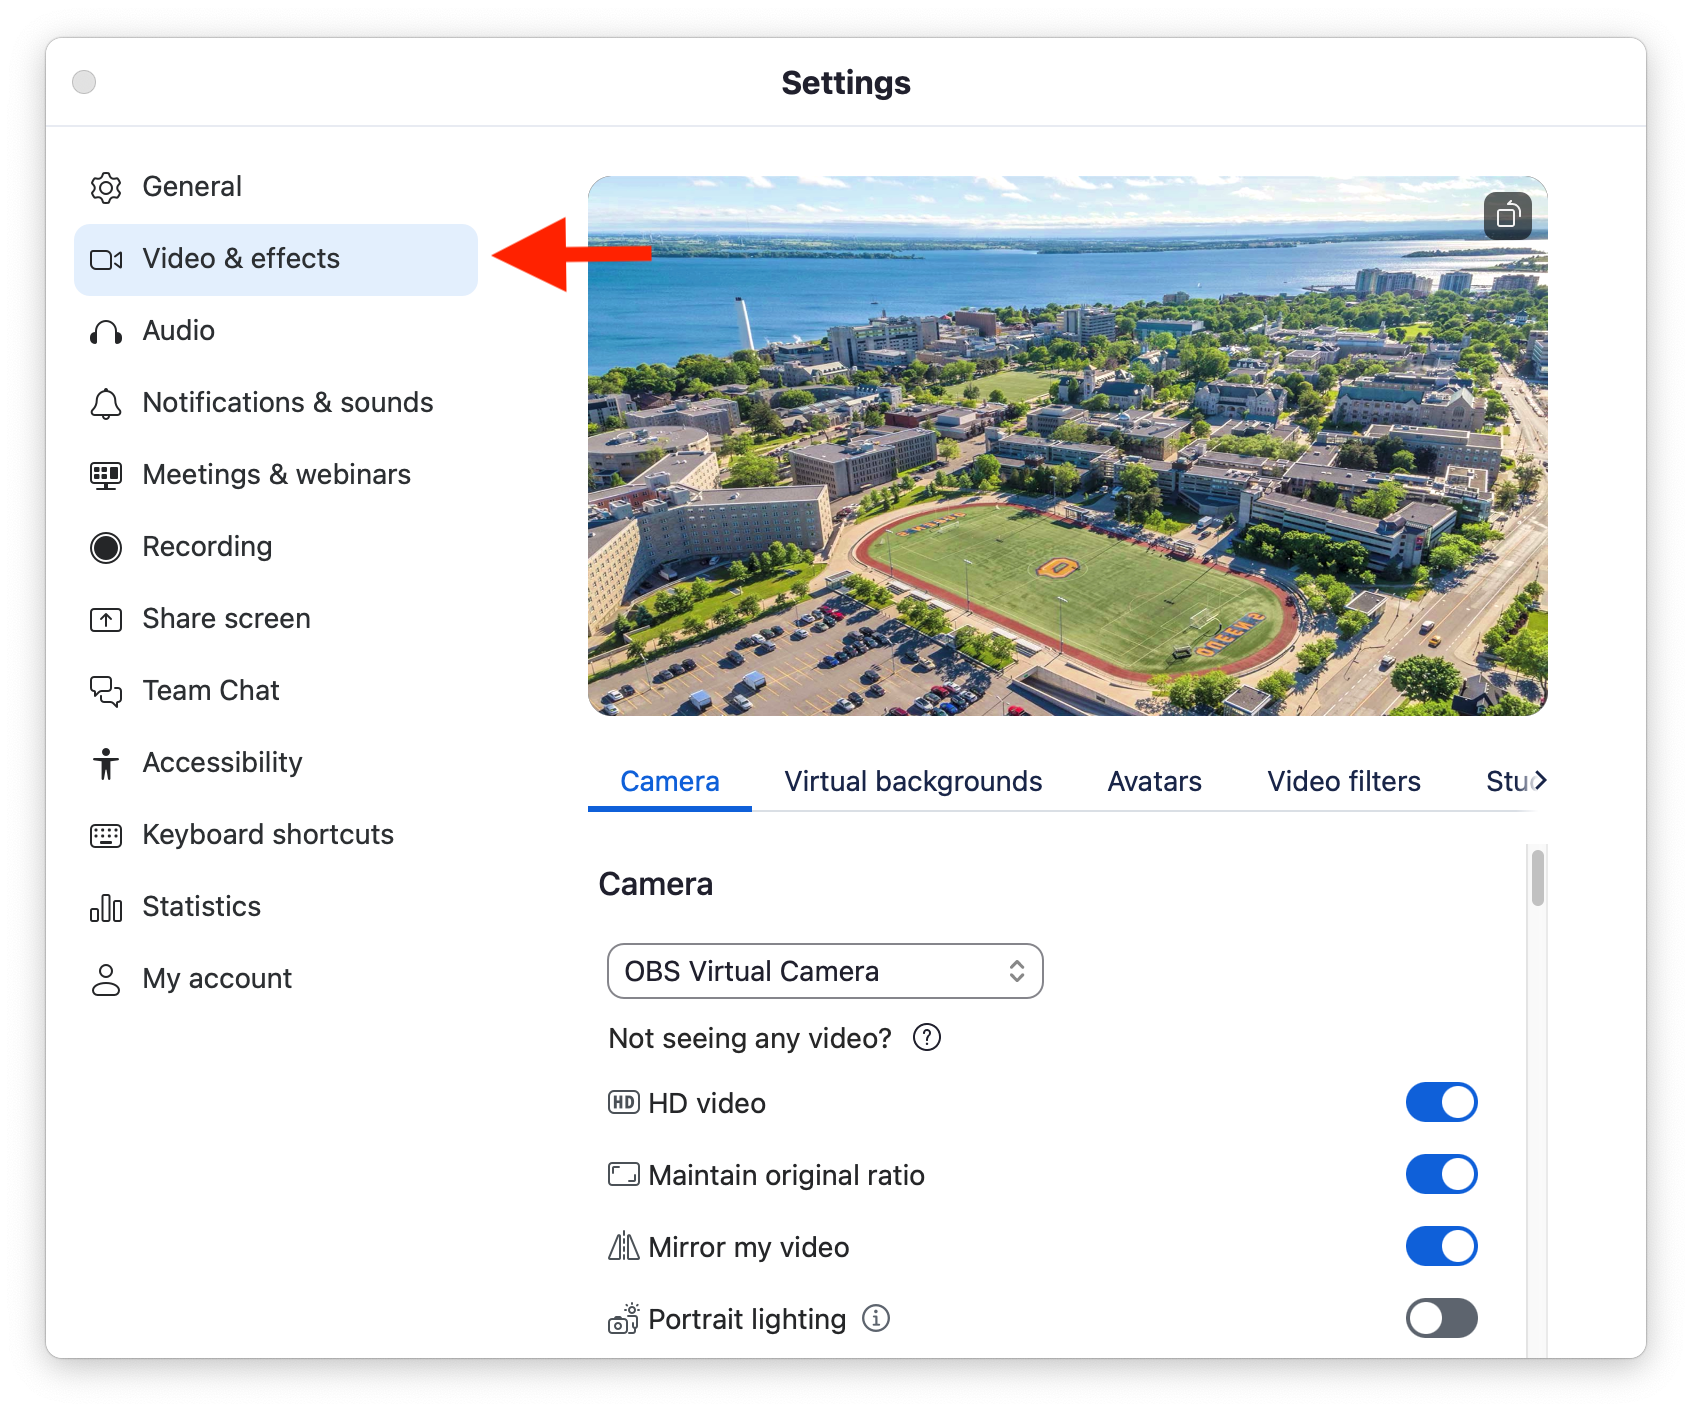
- To change your camera selection, use the dropdown menu to select a different camera for the Zoom meeting. *We suggest turning on “HD Video” & “Maintain Original Ratio” for better video quality.

macOS - Zoom Audio
- With the Zoom desktop app open, select the “Gear” icon in the top right corner of the Zoom window.
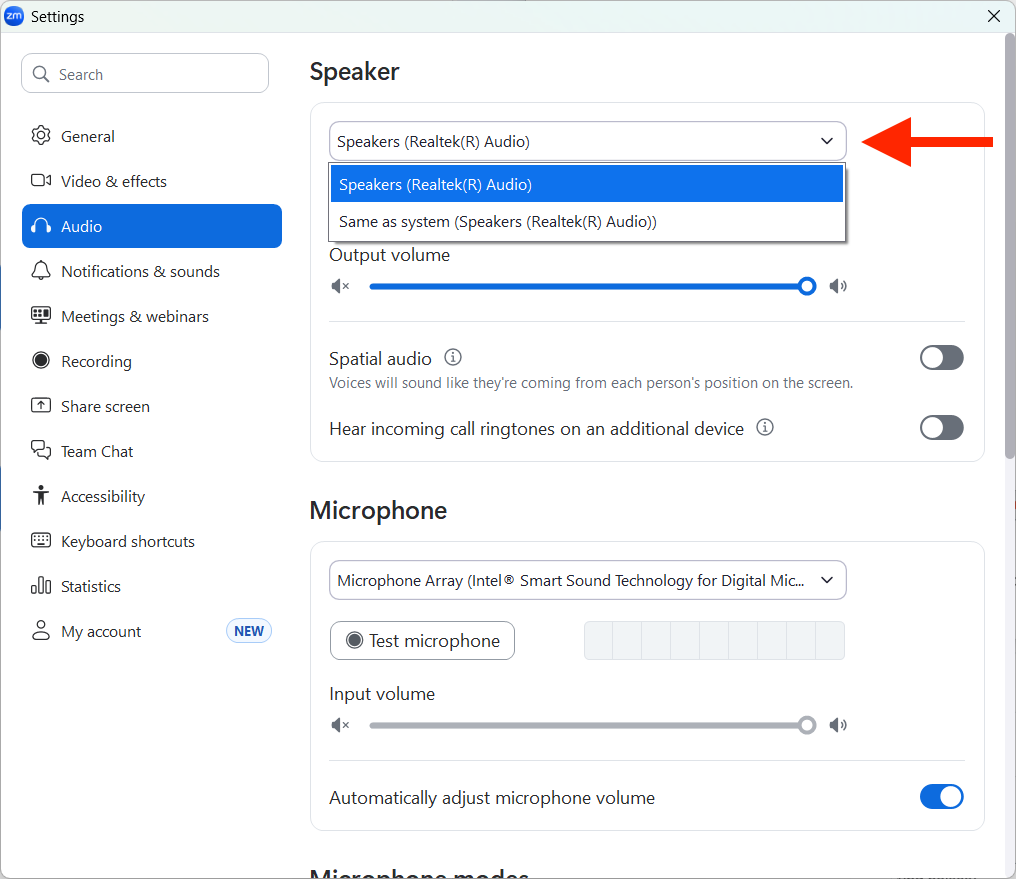
- Once the settings window is open, select “Audio” from the list on the left side of the settings window.
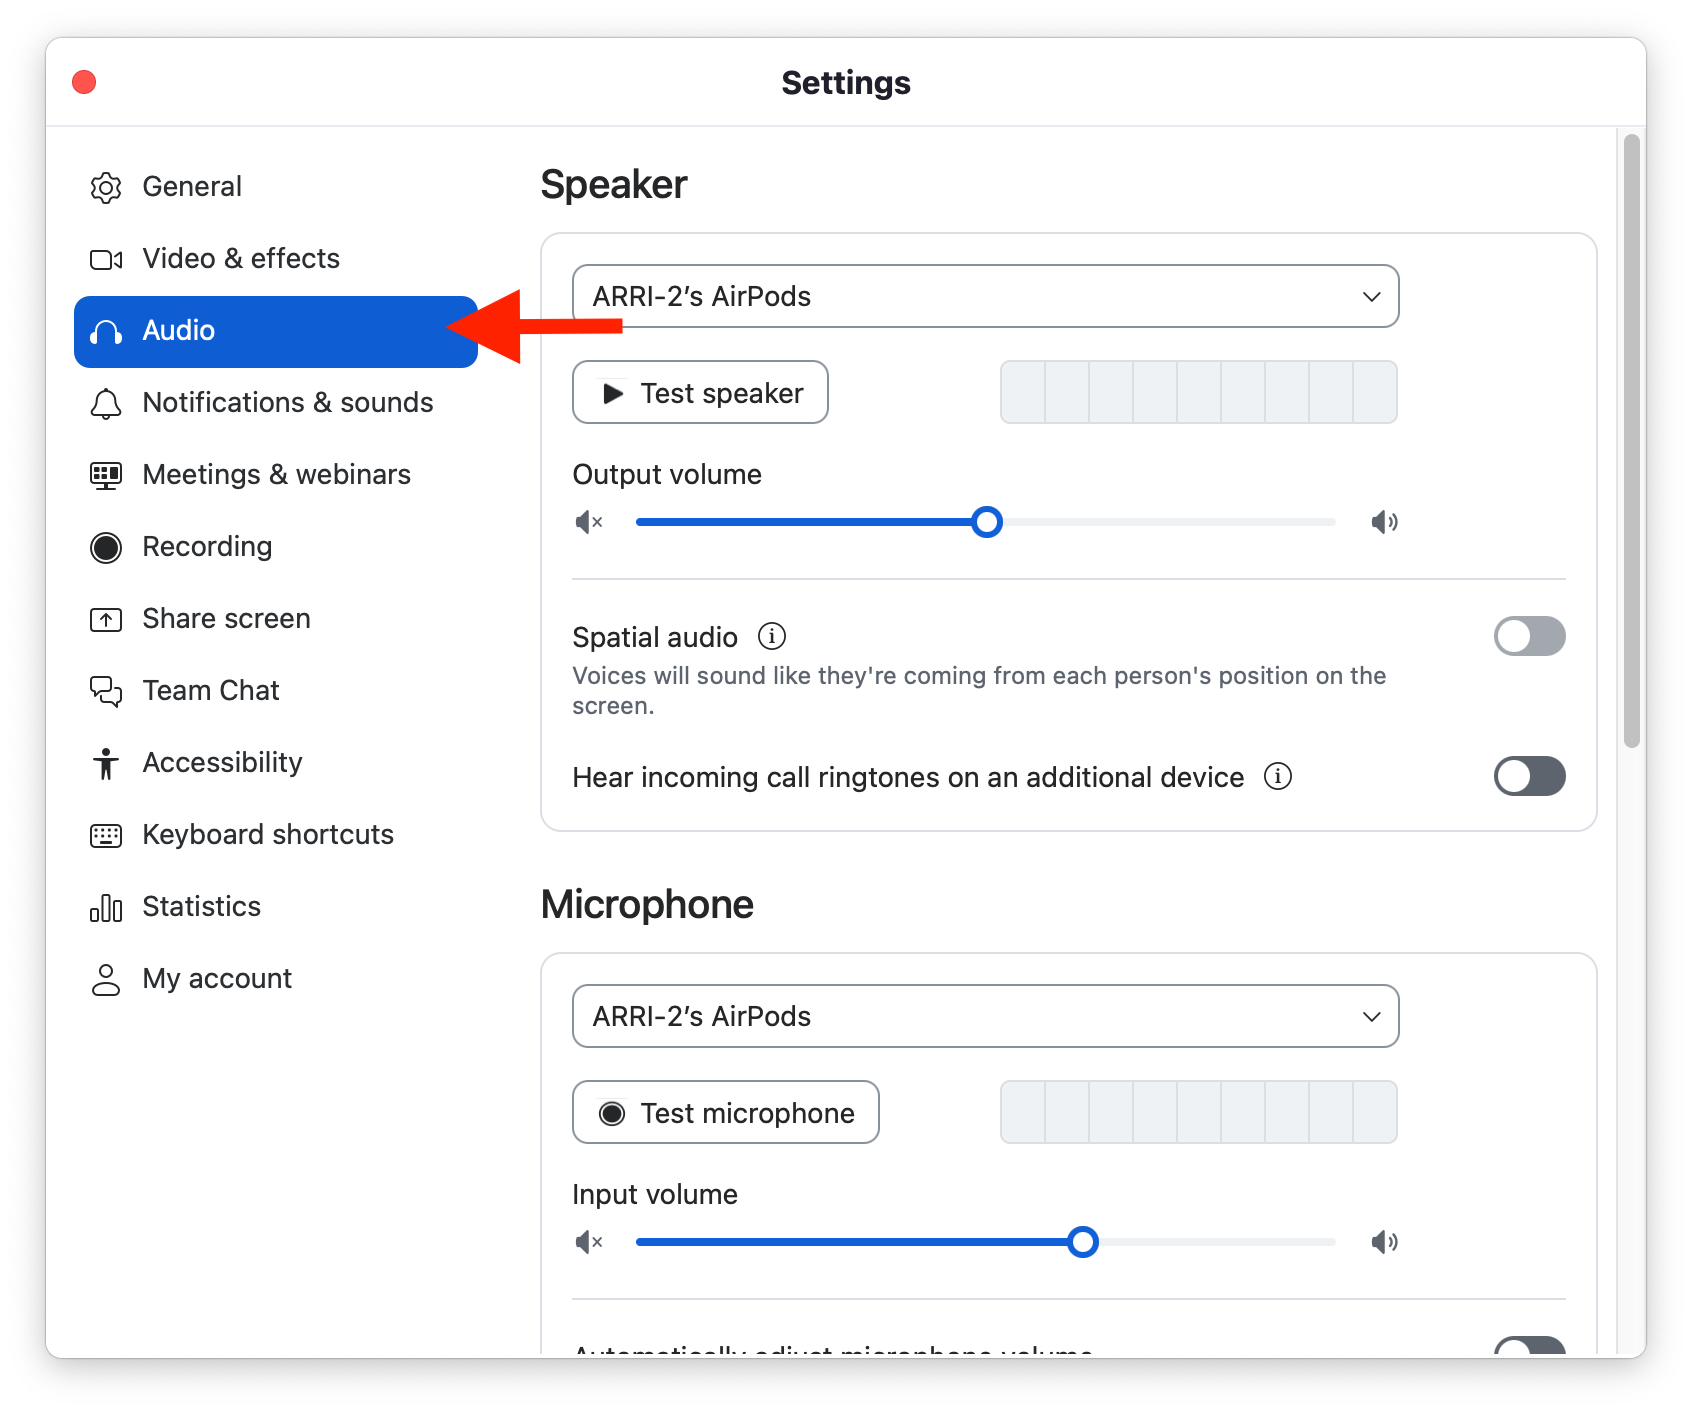
- To change your “Speaker” selection, use the dropdown menu to make a selection. *You can test audio playback by using the "Test Speaker" button. This will play sample audio through the selected speaker. The volume slider can be used to adjust the volume.
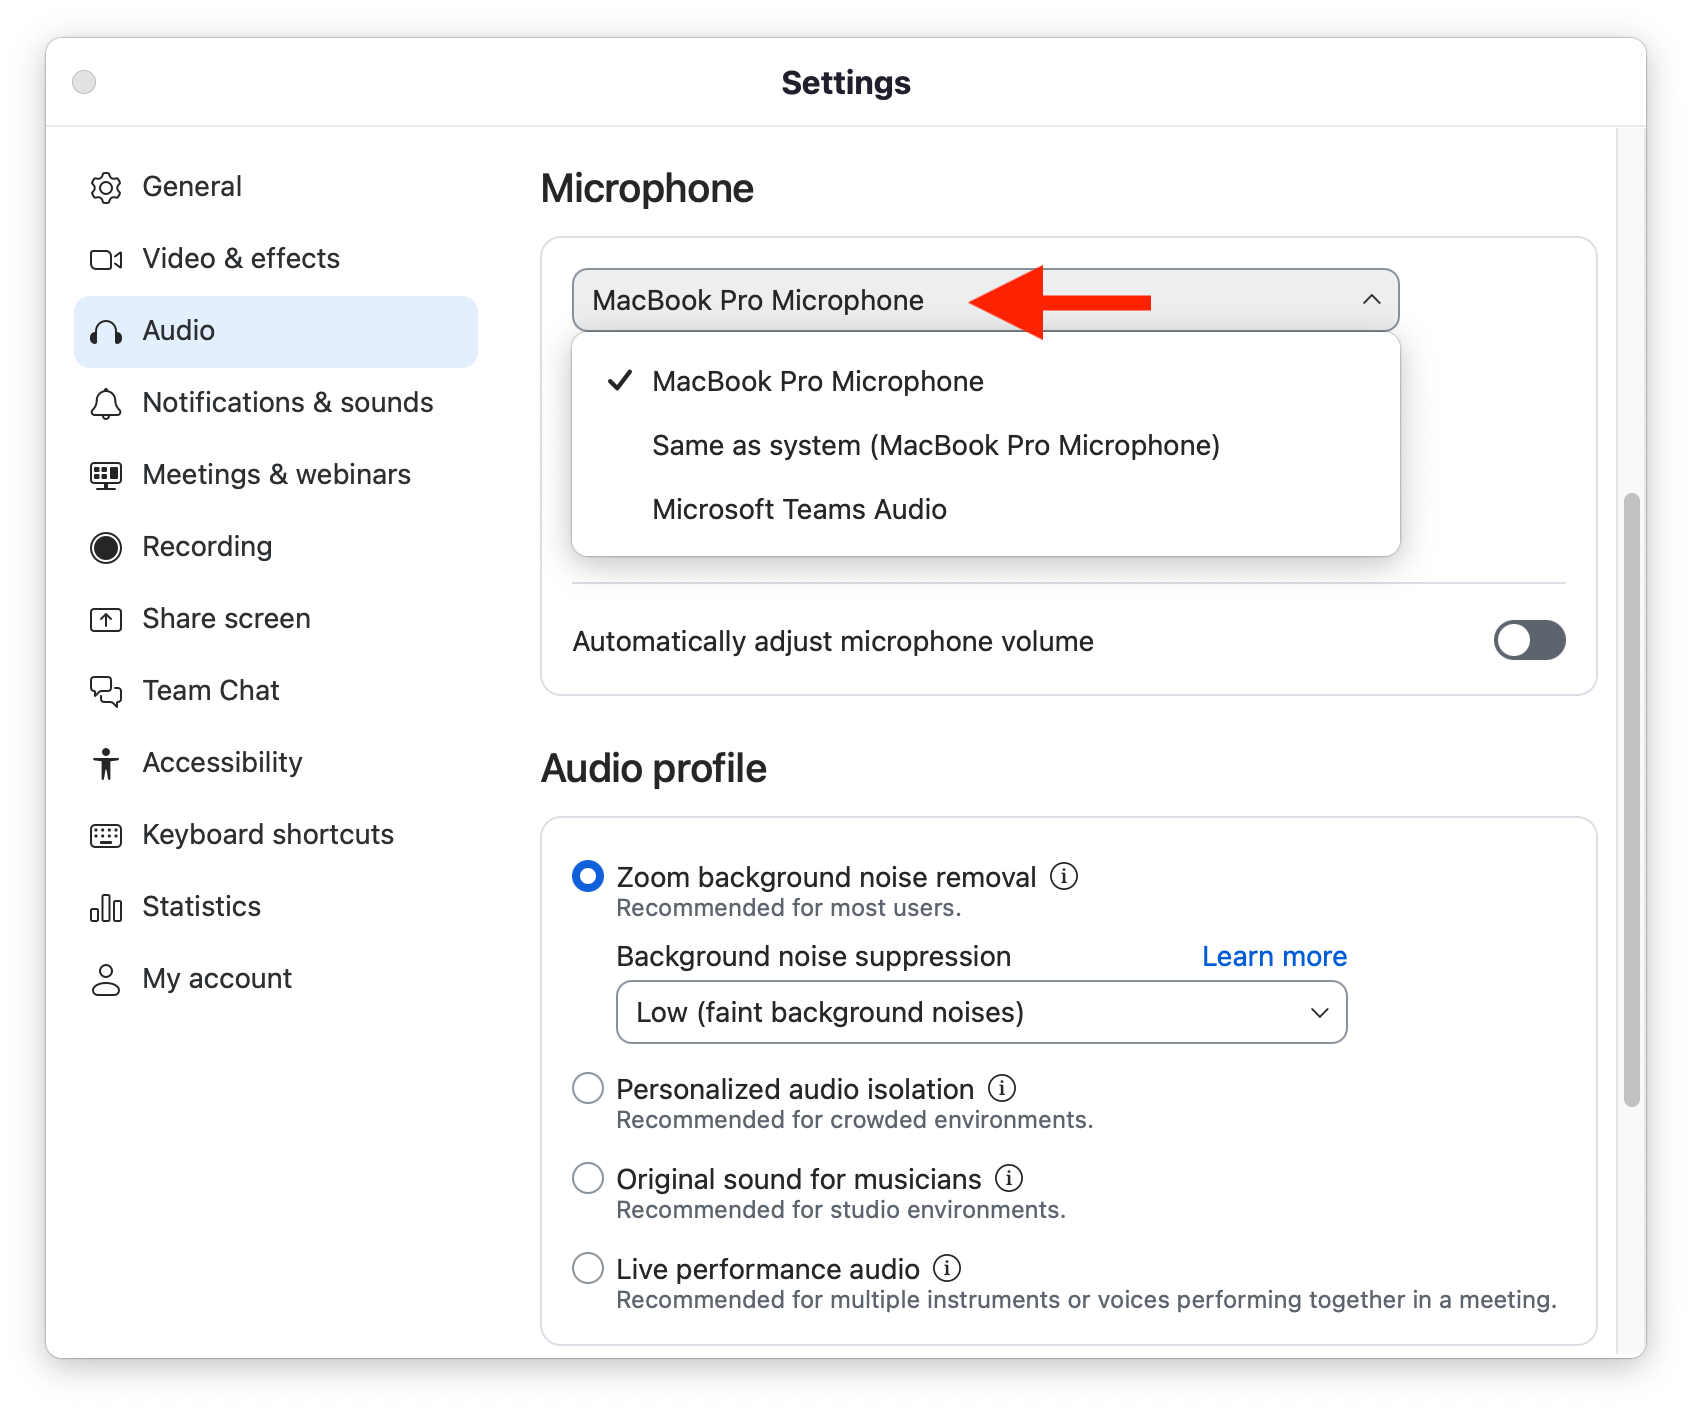
- To change the “Microphone” selection, use the dropdown menu to make a selection. * *You test the microphone by using the "Test Microphone" button. It will automatically record a short 5-10 second sample of the microphone and will automatically playback from your select speaker.

Windows - Zoom Video
- With the Zoom desktop app open, select the “Gear” icon in the top right corner of the Zoom window.
- Once the settings window is open, select “Video & Effects” from the list on the left side.
- To change your camera selection, use the dropdown menu to select another camera. *We suggest turning on “HD Video” & “Maintain Original Ratio” for better quality.

Windows - Zoom Audio
- With the Zoom desktop app open, select the “Gear” icon in the top right corner of the Zoom window.
- Once the settings window is open, select “Audio” from the list on the left side of the settings window.

- To change your “Speaker” selection, use the dropdown menu. *You can test audio playback by using the "Test Speaker" button. This will play sample audio through the selected speaker. The volume slider can be used to adjust the volume.
- To change the “Microphone” selection, use the dropdown to choose your mic. *You test the microphone by using the "Test Microphone" button. It will automatically record a short 5-10 second sample of the microphone and will automatically playback from your select speaker.

Additional Information
For additional information on Queen's Health Sciences supported rooms
Queen's Health Sciences - Supported Rooms
For additional information about Central Queen's ITS supported rooms
(click "Classrooms" tab at the top of the webpage for information about the rooms)
Central Queen's ITS - Supported Rooms
Zoom Official Support Page:
Was this article helpful?
That’s Great!
Thank you for your feedback
Sorry! We couldn't be helpful
Thank you for your feedback
Feedback sent
We appreciate your effort and will try to fix the article